This guide contains the relevant information for most Android based devices (eg Samsung mobile phones issued by Pegasus). Some of the steps might slightly vary depending on the model of your device.
This guide won’t work for Office 365 users
Common Connection Requirements
Username: Your Pegasus username, e.g. TimB1
Password: Your Pegasus password
Domain: Pegasus
Server URL: webmail.pegasus.org.nz
Security Requirements
A four digit PIN code for locking/unlocking the device. This is still required when your mobile device uses another form of locking the phone such as biometrics. Swipe to unlock is not a supported unlock method and you will have to set up a four digit unlock code.
The Set Up Process
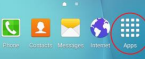
1. Tap on Apps
2. Navigate to Settings

3. Scroll down until you find Accounts and tap it to bring you to the Accounts menu
a. Some phones you may have to tap on Accounts a second time
b. Some phone might say Cloud and Accounts instead of Accounts
4. Tap on Add Account
5. Tap on Microsoft Exchange ActiveSync
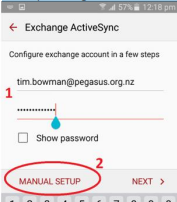
6. Enter your Pegasus email address, password and then tap on Manual Setup
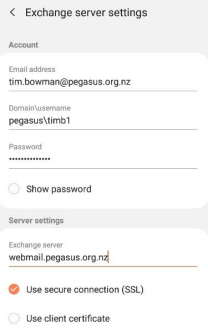
7. Enter the necessary information on the below fields:
– Email Address – Domain\Username: Pegasus\[Your Username]
Some phones may have the domain and username fields listed separately
– Password
– Exchange server: webmail.pegasus.org.nz e.g.:
8. Tap Sign In
9. Follow the prompts that you might get: – Accept all access permissions – tap OK to prompts
– If you get the Sync settings screen, choose your preferences and tap Next
– If you get the Device Administrator screen, Tap Activate
– If asked for a screen lock type, set up your preferred method. Tap Done when finished
10. Finally, in the Notifications/Sync screen, choose the notifications type you wish to receive and then tap on Done and follow the prompts until it finishes.